Easy Henna: The Ultimate Guide To Beautiful Body Art
Easy henna designs have become a popular trend for those looking to adorn their bodies with beautiful, temporary art. Whether for a special occasion or just for fun, henna provides a unique way to express creativity and culture. In this comprehensive guide, we will explore everything you need to know about easy henna, from its history to application techniques, ensuring that you can achieve stunning designs with ease.
In this article, we will discuss the various styles and techniques of easy henna, tips for achieving the best results, and how to care for your henna designs to ensure they last longer. Whether you are a beginner or looking to refine your henna skills, this guide will provide valuable insights and step-by-step instructions to help you create stunning henna art.
Table of Contents
- 1. The History of Henna
- 2. Benefits of Using Henna
- 3. Easy Henna Designs for Beginners
- 4. How to Apply Henna: Step-by-Step Guide
- 5. Aftercare for Henna Designs
- 6. How to Remove Henna Safely
- 7. Safety Tips for Henna Use
- 8. Conclusion and Final Thoughts
1. The History of Henna
Henna has a rich history that dates back thousands of years, primarily in the regions of North Africa, the Middle East, and South Asia. It has been used for various purposes, including body art, hair dyeing, and even as a cooling agent in hot climates. The tradition of applying henna during weddings and festivals is particularly prominent, symbolizing joy, celebration, and good fortune.
1.1 Cultural Significance
In many cultures, henna is more than just a decorative art form; it carries deep cultural and spiritual meanings. In Hindu weddings, for example, the bride's hands and feet are adorned with intricate henna designs, which are believed to bring good luck and prosperity to the marriage. Similarly, in Islamic traditions, henna is applied during celebrations such as Eid and weddings, symbolizing happiness and beauty.
2. Benefits of Using Henna
Choosing henna for body art comes with numerous benefits:
- Natural Ingredients: Henna is made from natural plant extracts, making it a safer alternative to chemical dyes.
- Temporary Art: Henna designs can last from a few days to a few weeks, allowing for versatility in expression.
- Easy to Apply: With practice, henna application can be mastered by anyone, regardless of artistic skill.
- Cooling Effect: Applying henna has a cooling effect on the skin, making it popular in hot climates.
3. Easy Henna Designs for Beginners
For those new to henna, starting with simple designs can help build confidence. Here are a few easy henna designs to try:
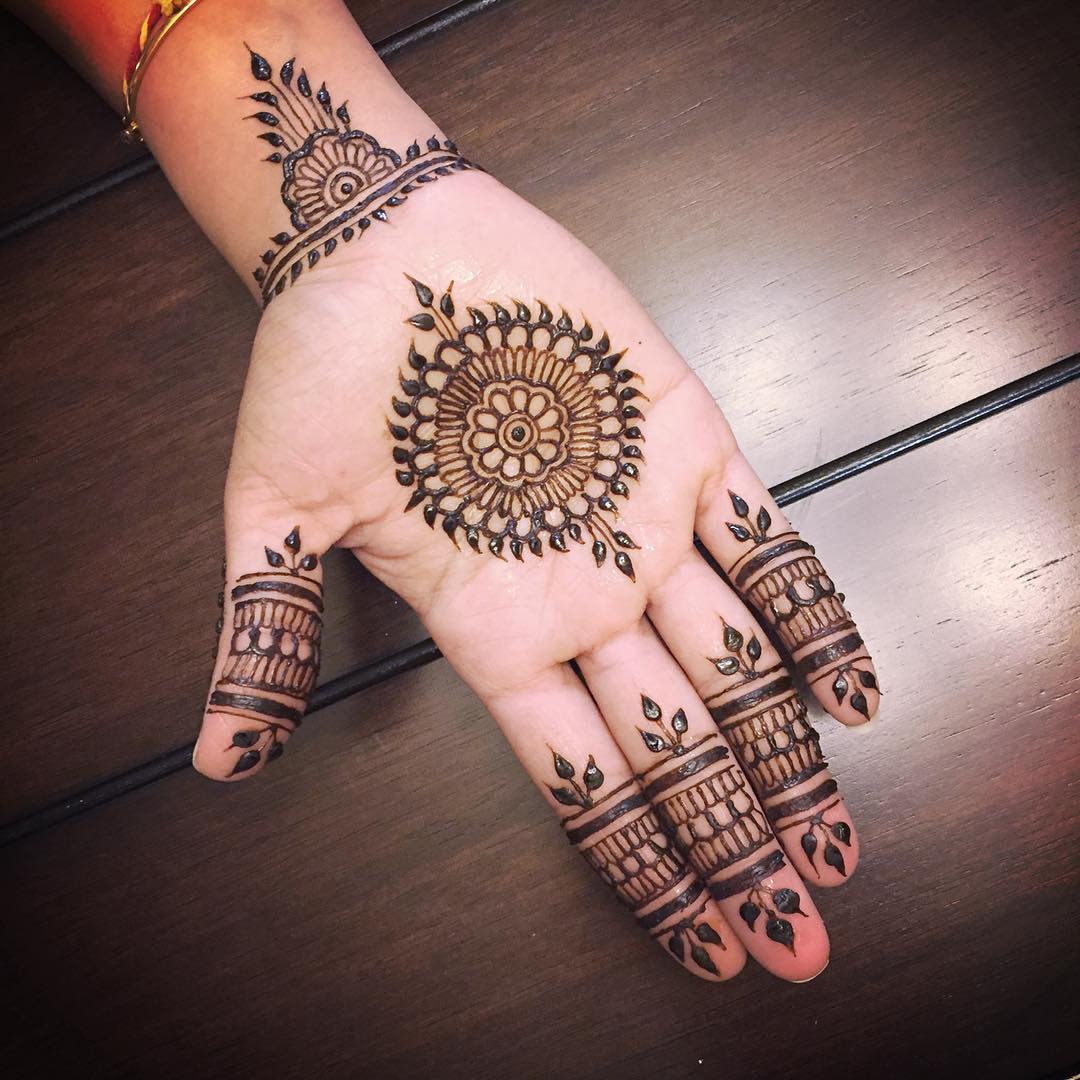
3.1 Simple Floral Patterns
Floral designs are a great starting point for beginners. You can create a simple flower by drawing a circle in the center and adding petal shapes around it.
3.2 Geometric Shapes
Geometric patterns, such as triangles or circles, can be easily combined to create unique designs. Experimenting with shapes can lead to beautiful, symmetrical henna art.
3.3 Mandala Designs
Mandala designs are intricate but can be simplified for beginners. Start with a small circle and gradually add layers of patterns radiating outward.
4. How to Apply Henna: Step-by-Step Guide
Applying henna is a straightforward process that anyone can learn. Follow these steps for a successful application:
4.1 Gather Your Supplies
- Henna paste (store-bought or homemade)
- Applicator cone or bottle
- Paper towels or cotton swabs
- Plastic wrap (optional)
4.2 Prepare Your Skin
Ensure that the skin is clean and dry before applying henna. Exfoliating the area can help the henna stain better.
4.3 Apply the Henna
Using the applicator, carefully draw your desired design on the skin. Start with light pressure and build up as you gain confidence.
4.4 Let it Dry
Allow the henna to dry for at least 1-2 hours. The longer you leave it on, the darker the stain will be.
5. Aftercare for Henna Designs
Proper aftercare is crucial for ensuring your henna design lasts as long as possible. Here are some tips:
- Avoid water for the first 24 hours after application.
- Moisturize the design with natural oils to maintain color.
- Keep the design away from direct sunlight.
6. How to Remove Henna Safely
While henna is temporary, you may want to remove it sooner. Here are some safe methods for henna removal:
- Use a mixture of lemon juice and sugar to exfoliate the area gently.
- Soak the design in warm water to help fade the stain.
- Apply a mixture of baking soda and water as a paste to lift the stain.
7. Safety Tips for Henna Use
While henna is generally safe, it's important to take precautions to avoid allergic reactions:
- Always perform a patch test before applying henna to a larger area.
- Avoid using pre-mixed henna products that contain harmful chemicals.
- Consult a dermatologist if you have sensitive skin or allergies.
8. Conclusion and Final Thoughts
Easy henna is a delightful way to explore body art while celebrating cultural traditions. With this guide, you can confidently create beautiful henna designs that reflect your personal style. Remember to embrace creativity, practice regularly, and enjoy the process of exploring henna art.
If you found this article helpful, please leave a comment below or share it with your friends. For more interesting articles on henna and body art, be sure to check out our blog!
Thank you for reading, and we hope to see you back soon for more exciting topics!
Hair 60: A Comprehensive Guide To Transforming Your Hair Care Routine
Girlfriends Quotes: Celebrate Your Best Friendships With These Heartfelt Sayings
Unveiling The World Of Pokémon Girlshunter: A Comprehensive Guide


